- Needles wear out. Change them on a regular basis! They don’t have to break to be bad, yet a new needle ,makes everything works better. Good rule of thumb is change the needle when you start a new project.
- Use only glass beaded head pins. Plastic ones will melt if they get too close to an iron. Quite a mess on your project and bad for the iron.
- NEVER use your fabric scissors on paper. There is no quicker way to dull your scissors than to cut paper with them. Keep several pairs of scissors nearby and label the paper ones.
- Be careful with magnetic pin cushions or measuring gauges, The magnetic field could mess with the hard drive on your computerized sewing machine.
- Finish your seams -If you don’t have a serger, use french seams or a regular zig zag stitch to finish off your seams. To zig zag a seam takes just a second and really makes a difference in the final product.
- Clean out your bobbin case. Open that bobbin case and there is all sorts of lint and crud. Clearly, it’s better not to wait until your machine jams…but if it does, take an extra minute to clean things out! Clean it out at least every new project.
- Keep your stitch length short. This will help the seams stay strong and prevent them from tearing away. Just select a stitch length that’s in the middle of the range on your machine.
- Clipping threads will give any project a clean and professional look.
- Pressing as you sew is what gives your piece a professional look. When you sew a seam, press it. Use a hot steam iron and press after each step. Not only will the end result be SO much better, the steps will be easier as well. You will save time and energy if you work with neatly pressed pieces of fabric. Here’s the best part…the feeling of accomplishment is amazing when you finish that last pressing and your pillow cover is ready to use. That moment for me is pure fun and no matter how many projects I have completed, it just keeps getting better. Does that sound lame? Oh well…lame but true!
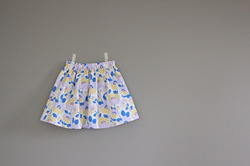
- Use Wide Elastic and Casings. It’s so tempting to put in skinny elastic and a small casing, especially when you’re short on fabric and you’re making baby clothes. But small elastic and casings looks cheap, so avoid it if possible. You’ll also want to make sure your elastic is snug in your casing so your elastic doesn’t twist within the casing during the wash, which is both annoying and a tell-tale sign of homemade.
- Create Wide Hems and Cuffs. I love wide hems. If a pattern calls for a 1/2″ hem, I often add extra length so I can have a 1-1/2 to 2″ hem. It makes the garment look more expensive because you didn’t skimp on the fabric. If I have to choose between a dress length with a small hem and a tunic length with a wide them, I almost always choose the tunic length. It also has the added benefit of being able to lengthen a garment if needed. And trust me, I’m always so grateful for a wide hem when I need to lengthen a dress.
- Understitch the Collars and Facings. Nothing screams homemade like a collar that won’t stay down. And nothing is as annoying as constantly trying to smooth it down when you’re wearing it. Facings that won’t stay down are just as bad.
- Stay stitching. It’s so tempting to skip the stay stitching, but don’t. Stay stitching is a line of stitches that stays in the garment to help curved edges like necklines retain their shape so they don’t get saggy or stretched while you’re sewing. Because frumpy necklines just don’t look good.
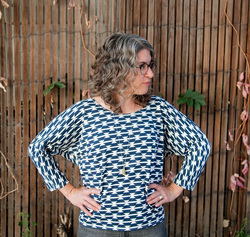
- Use a Double Needle or Coverstitch to Finish Knits. You know that double row of stitching on the hem of your favorite t-shirt? It’s a special stitch that stretches AND looks good. On a sewing machine, you can use a double needle to get this stitch, or if you’re lucky you can use an overlocker to sew your hem and finish your edges all at once. Either way, that double stitched look really makes a difference on the finished look of knits.
- Pre-wash your fabrics for items that will be laundered. Have you ever finished a wearable project you love, only to wash it once and discover that it just doesn’t fit quite right anymore? Chances are that you neglected to pre-wash your fabrics, resulting in shrinkage that alters the entire look of the finished garment. Pre-washing fabrics ensures that any shrinkage will occur before your garment is constructed, so you will never have to worry about this issue again. This is particularly important when you are combining fabrics from different manufacturers or even different collections from the same manufacturer, as the fabric content can vary so much from one fabric to the next, and stitching the different unwashed fabrics together can cause those seams to pucker once they are washed.
- Use the right needle. All needles are not created equal. There are dozens of different needle sizes and shapes, with specialty needles available for just about any project you can imagine. There are standard, all-purpose sharp needles, of course, which will usually do the trick for run-of-the-mill garment and home dec sewing. But anyone who has ever attempted to sew two particularly heavy fabrics and broken a needle in the process can attest that sometimes a specialty needle is necessary. Aside from preventing needle breakage, using the right needle for a project will allow the needle to glide through the fabric easily, preventing seam puckering and fabric damage.
- Professional Button holes.. http://www.threadsmagazine.com/item/23763/making-pretty-buttonholes/page/all
- Professional Zipper http://www.sewmamasew.com/2007/05/installing-a-zipper-tutorial-by-michelle/
A few more places to read about improving your sewing or some really good tricks to know...
- http://thesewingloftblog.com/simple-steps-improve-sewing-skills/
- http://thesewingloftblog.com/sewing-tips-tools-tricks/
- http://mylistoflists.com/13-sewing-hacks-and-tricks-you-have-to-know/
- http://www.sew4home.com/tips-resources/buying-guide/using-right-presser-foot-makes-sewing-easier-faster-more-professional
Taken from
http://www.onsuttonplace.com/2013/07/sewing-tips-for-professional-results/
http://www.mabeyshemadeit.com/7-ways-to-make-your-sewing-look-more-professional/
http://www.positivelysplendid.com/2013/05/5-simple-things-to-do-right-now-that-will-improve-your-sewing.html#_a5y_p=1301953
 RSS Feed
